In the quest to find the best cup of coffee that most perfectly shapes your tastes and desired experience, the coffee brewing method itself is often overlooked. Sure, there are lots of tips to improve your cup of coffee. We’ve spoken in the past about things like water, or the processing method, or how things like elevation effect coffee outcomes. But what about things more directly under your control? Well, there are tons of ways for you to make that coffee of yours. And there are tons of pros and cons to each of these different coffee brewing methods. You’ve probably wondered how these would affect your coffee. Today, you no longer have to wonder. We’re going in-depth on all of the coffee brewing methods.
French Press
How to use it:
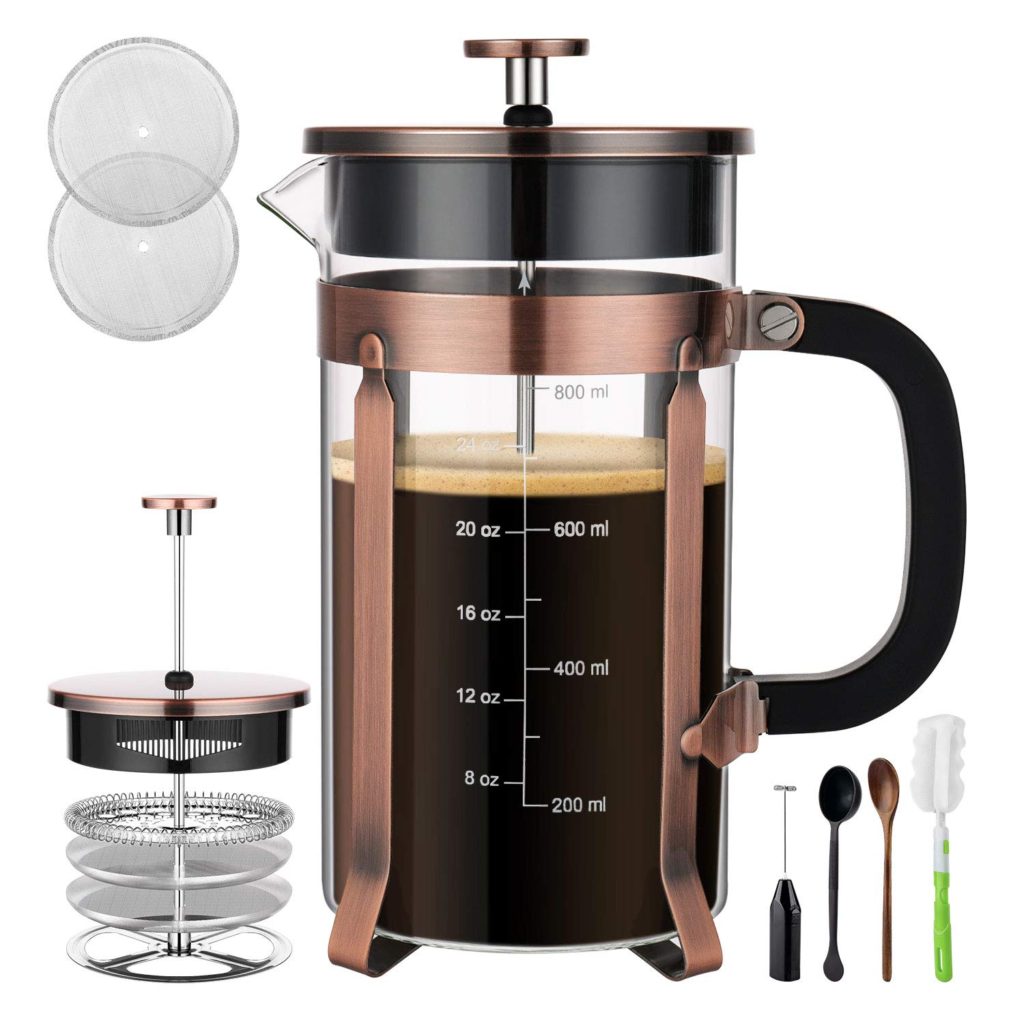
The French Press works by you placing both the hot water and the coffee grounds together. You then let the coffee grounds be submerged in the hot water for a couple minutes. To extract the coffee without getting grounds in the drink, you press down on a plunger mechanism. This plunger has a sort of filter built-in. This allows the coffee to pass through and keeps the coffee grounds at the bottom. You can now pour out a great cup of coffee. The French Press is popular amongst the different coffee brewing methods. The level of control combined with its ease of use and fair price point makes it a solid option.
Pros:
The French Press allows for a lot more control. You can put any temperature of water in it and have the submerged coffee in it for however long you like. This allows you to play around with that to make your own perfect cup of coffee. The French Press can also be used to make tea and other similar drinks as well. The submersion allows for a much more even and solid extraction of the coffee from the coffee grounds as well. A French Press can make up to 8 cups of coffee.
Cons:
You need to really pay attention when using a French Press. If you don’t measure the temperature of the water beforehand, you could ruin your coffee. You could be putting in water that is too hot or too cold. Finely ground coffee doesn’t work particularly well with this coffee brewing method either. Fine coffee grounds might slip through the filter. Plus, you can’t use your own paper filter. If you leave your coffee grounds submerged for too long or too little it will greatly affect the quality of the cup of coffee as well.
Aeropress
How to use it:
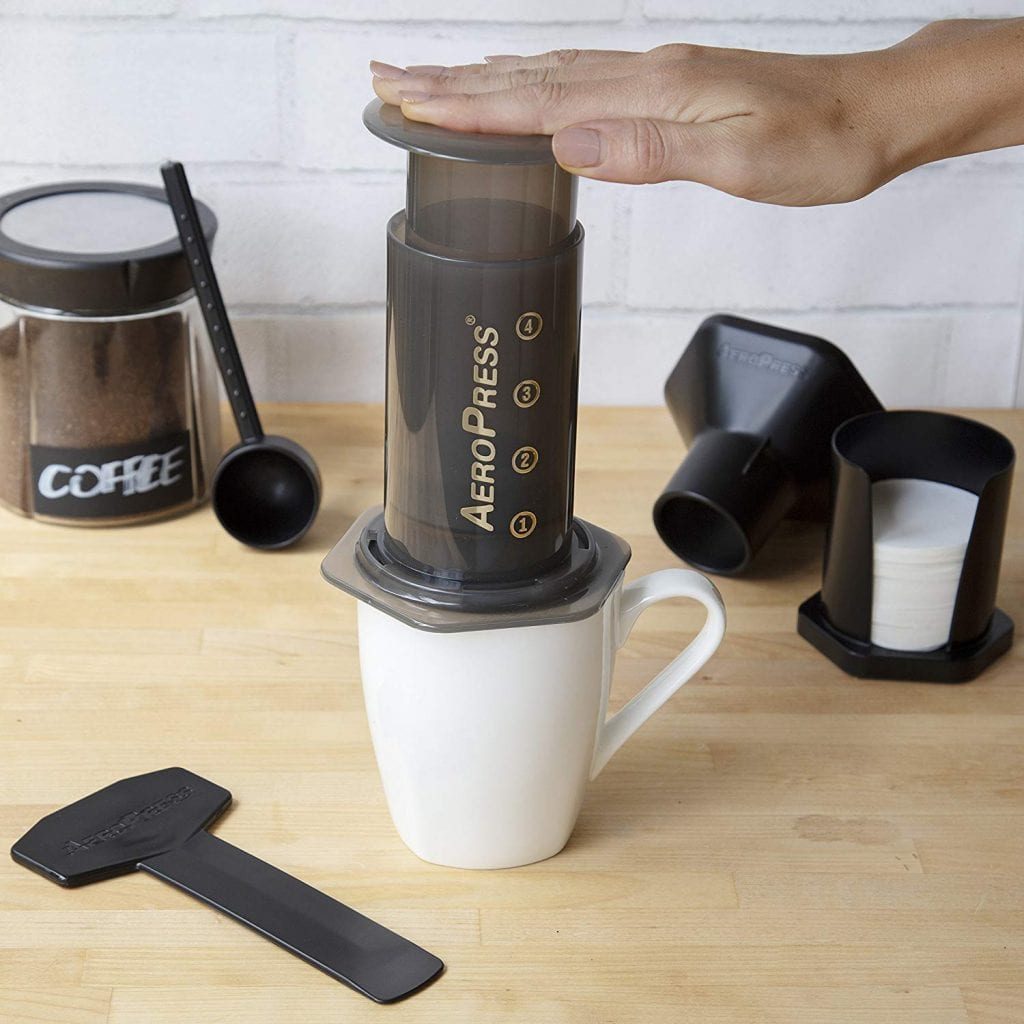
The aeropress works quite similarly to the French Press, but with some key differences. You place the coffee grounds and the hot water in the aeropress in a similar manner, but you use your own filter. Besides this, the aeropress gets squeezed directly onto your coffee mug.
Pros:
Even more control over your cup of coffee. This allows you control not just of the water temperature and amount of time the coffee grounds are submerged, but the type of filter can affect coffee taste as well. Metal filters tend to allow more oils to come through. Paper filters tend to trap those oils, but you can also use even finer grinds of coffee without worrying about it getting into your cuppa. There is also an element of pressure to using an aeropress, which helps brew your coffee even more quickly (especially if using even more finely ground beans). The aeropress is also easier to clean and is more portable.
Cons:
The biggest con behind the Aeropress is that you can only make a cup or two at a time. Also, the filters need to be specifically made for Aeropress, so you can’t just grab whatever you want there in the store. The Aeropress also has the other potentially negative as the French Press in that you need to be mindful and pay attention while you make it. It’s great for a custom cup of coffee on the weekend, but maybe not so great for the person rushing to work or making a cup on the job for the whole office.
V60
How to use it:
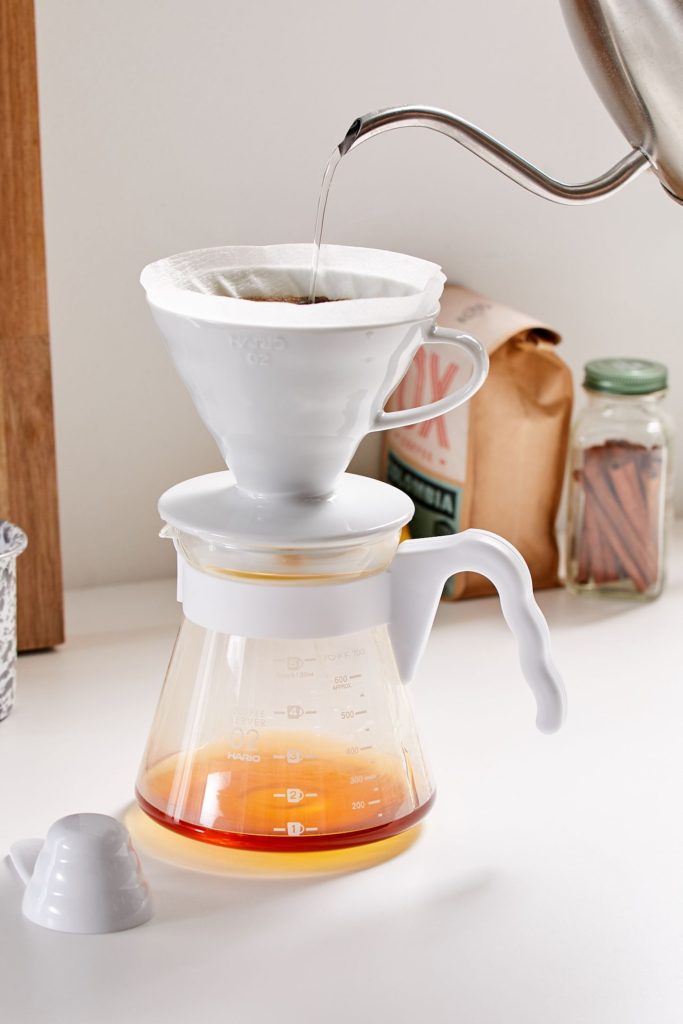
The V60 works by you placing it on top of a coffee pot or coffee mug, placing a filter in the cone shape top, placing the coffee grounds in afterward, and pouring hot water on top. V60 cones also have a finer filter than most and have ridge lines too. These ridgelines help guide the hot water when it is poured in. But, also, the filters tend to stick to the edges of the Chemex and comparable methods. The V60 allows for the coffee to escape more quickly and not sit in the hot water for as long. Also, being used with the pour-over method, you have a lot more control. You can control things like how much water you pour in and for how long. The V60 can come in ceramic, glass, plastic, stainless steel, or copper. Each of these materials has a slightly different effect on the coffee.
Pros:
V60 filters tend to be very thin and fine. Despite this, the angle and the ridges help keep out extra sediment. The ridgelines also help create more even distribution of the hot water when it is poured in. But this method also allows the coffee to pass through a bit more quickly. When this happens, it allows for more natural oils to make it into your coffee. The clean up tends to be super easy, and you can easily find portable V60s. The V60 coffee filter is fairly common, too.
Cons:
Generally the V60 method can only make a couple cups of coffee at a time. Although, nothing is really stopping you from putting it on top of a regular-sized coffee pot. The cone itself is rather small though, meaning you have to give it quite a bit of attention if you want to make larger quantities of coffee with this brew method.
Chemex
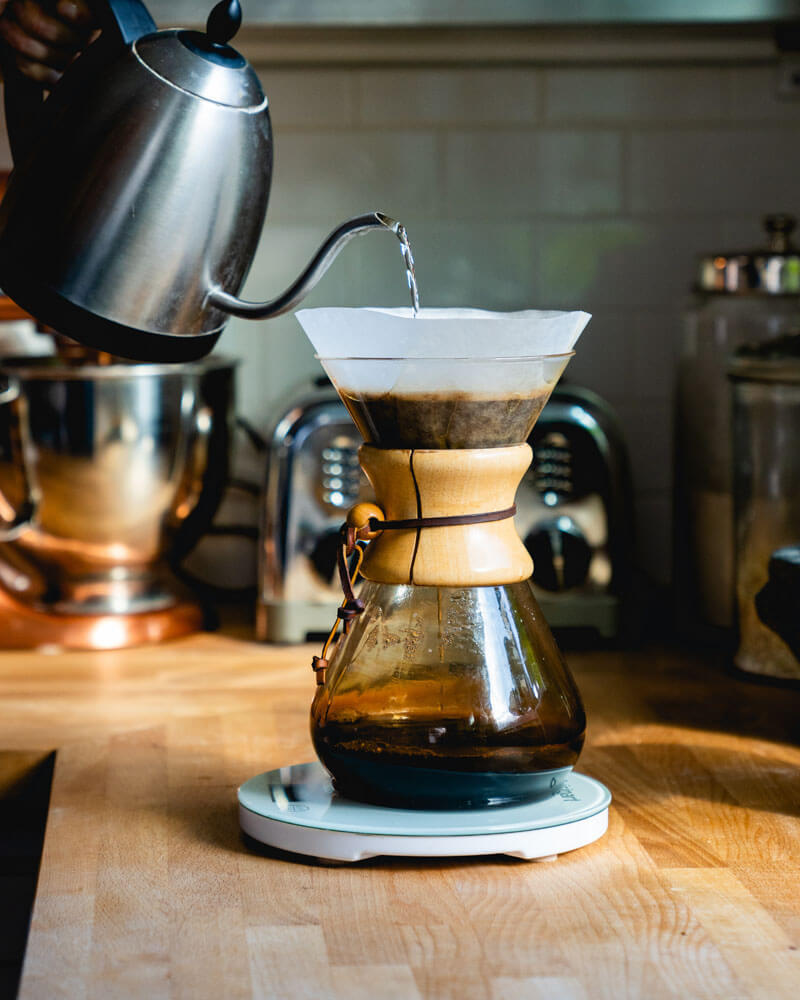
How to use it:
The Chemex works just like the V60 described above, it is just larger and has different filters associated with it. A Chemex tends to be a fairly large piece of glass that can hold a full 12 cups of coffee. The Chemex has an hourglass type shape. You place the filter on the mouth on top, the coffee grounds on the filter, and pour your water on top. The coffee filter for a Chemex tends to be thicker, and the filter tends to stick to the glass. This all means that the hot water stays in with the coffee grounds a bit longer than with the V60. Because of this extra extraction time, Chemex users should use a thicker or coarser coffee grind.
The thicker filter also tends to leave the coffee a bit more on the clear side than most other coffee brewing methods. This is a pro for some people and a con for others. In our estimation, it’s a great brewing method for those who can’t drink black coffee from most other coffee brewing methods. For those that would like to try and taste the difference nuanced flavors of new coffees, without being overwhelmed by the darkness or bitterness that other methods have more of, the Chemex might be a good try.
Pros:
The Chemex looks fairly beautiful, almost like a nice glass vase. It’s great to keep out for company to get comments, while also keeping coffee on hand for a larger group. It’s probably the best option for looking good while entertaining. It just comes across more nicely if you poured your guests’ mugs with this rather than a typical coffee pot.
Cons:
Compared to the V60, the extraction time is quite a bit longer. And this isn’t just because you can pour more hot water in, either. The thicker filter slows down the process, and the lack of ridges means all the water must pass through the very bottom of the top cone-like shape. This also means that the coffee grounds at the bottom are getting more time in the hot water than the parts at the top.
Auto Drip
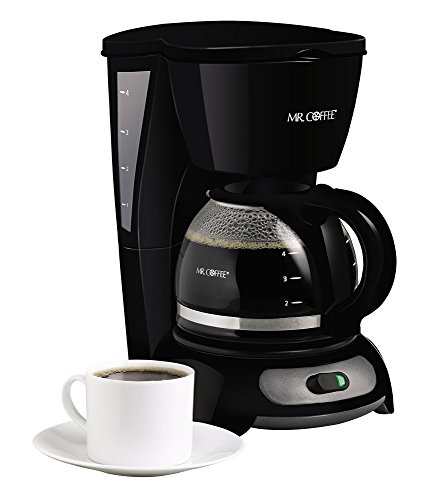
How to use it:
First you determine how much coffee you want to make and pour in the equivalent amount of water into the water reservoir. Some drip coffee machines have built in filters and others require that you purchase your own. Determine which is the case for your coffee maker. You also have your choice of being able to either purchase an auto-drip coffeemaker with a built-in filter, or get one that takes paper filters. Paper filters tend to absorb more of the coffee If a filter is required, place that first in the section meant to hold the coffee grounds, then place the coffee grounds on top. Press the start button, and the machine handles the rest.
Pros:
You can set it and forget it while the coffee brews itself. This is perfect for people who are getting ready for work in the morning, or who are perhaps at the office and can’t take large quantities of time out of their day to get coffee. The water temperature doesn’t have to be measured, the coffee process doesn’t have to be tended to, and it makes a consistent cup of coffee each and every time, whereas manual modes of brewing might have more fluctuations. Also, most auto-drip coffee makers have hotplates that keep the coffee warm for hours on end. You can also choose to make one cup of coffee or 12, or anywhere in between. Most machines these days also come with built-in timers, so you can prepare the coffeemaker the night before and have it begin brewing at any time you choosing.
Cons:
You’re sacrificing efficiency and speed for quality in some sense. Although you can select “brew strength” with many newer auto-drip coffee makers, you can’t really adjust lots of variables that can change your cup of coffee. You can’t adjust water temperature, you can’t adjust extraction time, and it’s going to brew the same way regardless of how thick your coffee grounds are. Cleaning these machines is generally both a hassle and also not the most effective. It’s mostly just running plain hot water through the system, hoping that does the trick. It’s also fairly easy to forget about your coffee and end up with mold either in your coffee pot or in the wet grounds inside the coffeemaker.
Percolator
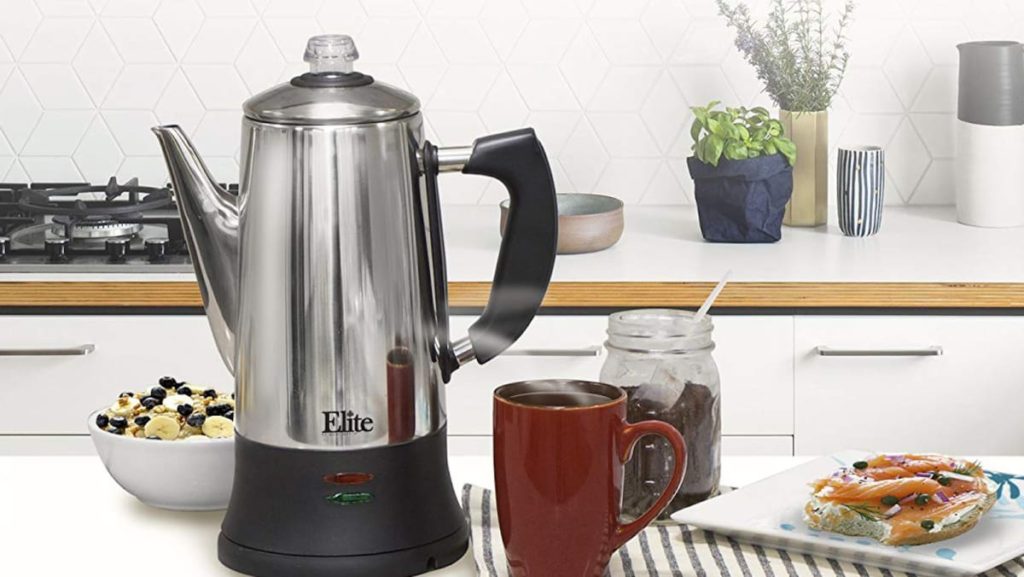
How to use it:
Percolators are probably among the oldest ways to brew coffee. Although there are automatic and more controllable percolators these days, they tend to have the same pros and cons. Percolators are also known as “the cowboy method” of brewing coffee, to some. This is because many cowboys and soldiers and campers would just throw the coffee grounds and water altogether into a special metal pitcher, would heat it over a fire, and drink it that way. A percolator works by having the water stored in essentially a big pitcher, and then there’s a separate place above the water that holds the grounds. The water down below starts to boil at the bottom and then condenses on top and drips into the coffee grounds, which then makes it’s way down to where the water is boiling, but has greater amounts of coffee now flowing into it.
Pros:
You can take it anywhere and can have coffee wherever you can find a heat source. It’s simple to make and simple to clean. Percolators aren’t usually too expensive, either. These days you can get electric percolators too (although thee clearly can’t be tossed onto a campfire). Percolators can also be used for tea and other things without worries.
Cons:
Coffee from a percolator tends to be over extracted and overly bitter as a result. The ideal temperature to brew most coffee is around 200 degrees, but you need at least 212 degrees Fahrenheit to boil water. To get a quality cup of coffee you have to be better about timing and measuring things too. It takes some practice to get a cup of coffee that you like, and to do so without getting some sediment in it. Also, oftentimes the coffee/water combo at the bottom starts to overlap with the coffee ground area as well. Overall, it’s just a lot less control and a very high risk of inconsistent cups of coffee and over-extracted coffee beans.
Siphon/Vacuum Pot
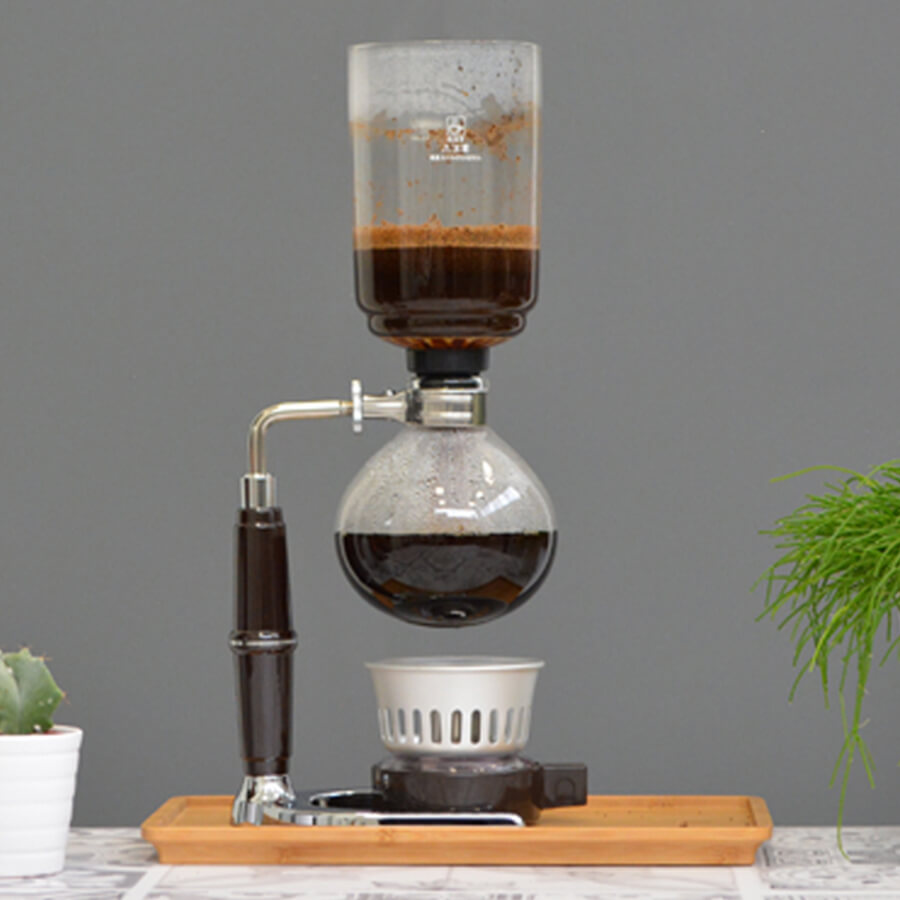
How to use it:
A siphon coffeemaker works similarly to a percolator, but offers a lot more control and visibility. You start off by filling the bottom beaker with hot (not yet boiling) water. The top beaker is hollow and has a pipe going through it, and you place a filter on it. Generally there is a pull-down mechanism to keep the filter at the bottom of the top beaker. The bottom beaker is then brought to a boil with a burner placed underneath it. This causes the hot water to rise to the top beaker. At this point you drop the temperature on the burner so that there is enough heat to keep the water from falling back down, but not enough to boil the top beaker.
Now, you place the coffee grounds in the top beaker and stir it so that it is evenly distributed. The coffee is then brewed and you time how long you want this to happen for, and then drop the heat on the burner down below. Stopping the heat causes the pressure to drop and the coffee falls from the top beaker to the bottom, passing through a filter on its way.
Pros:
First off, siphon coffee makers are subjectively some of the coolest looking coffeemakers out there. It looks like you have a mad scientist or a steam punk kind of coffee setup going on. The siphon coffeemakers come with more control than a percolator as well, and keeps the coffee separated from the grounds better. You also get fully immersed coffee grounds, leading to an extraction process more similar to a French Press or Aeropress.
Cons:
You still have less control over water temperature and the extraction process once it’s in the top beaker. You’ll also need filters that aren’t as readily available in most supermarkets. It also takes a decent amount of time to boil water, although once that happens, the siphon actually isn’t too bad since it fully immerses the coffee grounds.
Moka Pot
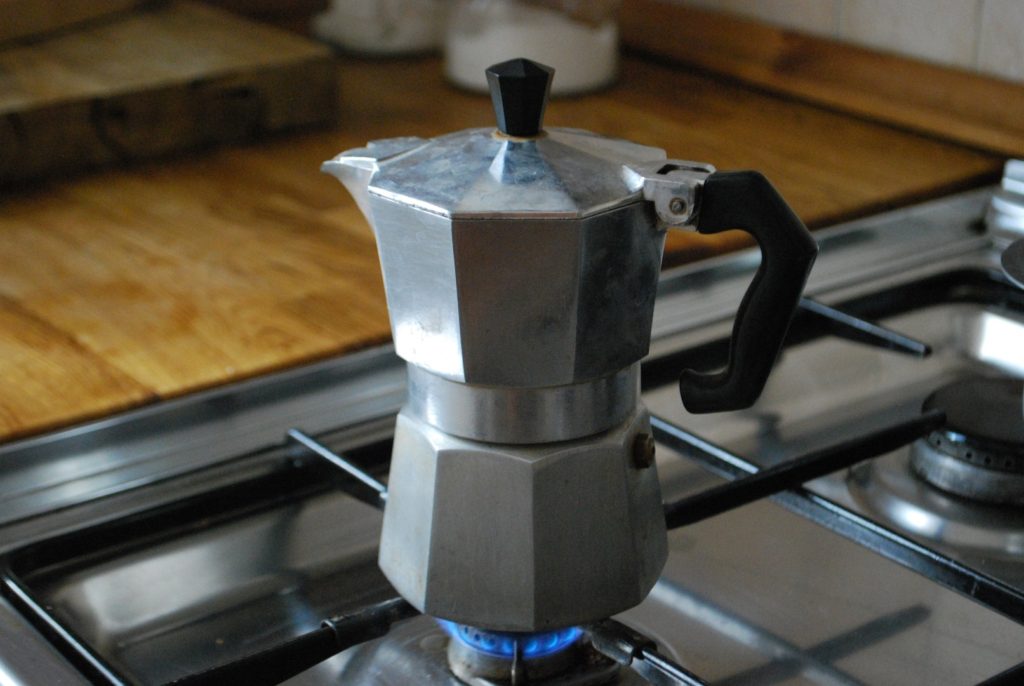
How to use it:
A Moka Pot works in a manner similar to a percolator. You may not be able to tell from the picture above, but it comes in a couple different compartments. There is a water reservoir and a place to put your coffee grounds. Once you have the water and coffee compartments attached, it screws onto the bottom of the largest component, where the coffee ultimately ends up. Unlike the percolator, the water boils up and into the coffee grounds and then continues moving up into a separate compartment. The coffee spurts out of the upper compartment and is in a totally separate compartment. Moka Pots are typically best with a medium coarse grind. This also tends to make a slightly thicker coffee than your standard drip coffeemaker, and sometimes gets referred to as a stovetop espresso maker as a result.
Pros:
The Moka Pot has the relative travel-ability of the percolator and V60 coffee brewing methods. If you have coffee and a heat source, you can make coffee. The Moka Pot is also easy to clean, and doesn’t require a filter or anything like that. You get a slightly thicker coffee, which many people like.
Cons:
It is easy to over-extract with a Moka Pot. Also, if you don’t have an easily controlled heat source, chances are decent that it’ll make an iffy cup of coffee if you don’t know what you’re doing. Sediment is also more likely with this particular coffee brewing method.
Espresso Machine

How to use it:
First you take your finely ground coffee grounds and put it into what’s called a portafilter. You then use a tool called a tamper that you press down on and applies pressure. The portafilter is then added to the espresso machine and the machine is turned on. Many espresso machines also come with ways to steam or froth milk. These machines have a separate nozzle that goes into your milk to assist you with the process.
Pros:
You can make a boatload of top-notch, high-quality coffee drinks. Lattes, cappuccinos, americanos, ristrettos, and more will be at your fingertips with an espresso machine. In terms of being able to make high-quality drinks, no other machine compares.
Cons:
Espresso machines are also by far the most expensive machines on the market. Also, to be able to make all of the fancy drinks, you have to learn what goes into them as well as how to make them. The learning curve can be quite a bit steep, and your skill set will at least partially determine the quality of your drink.
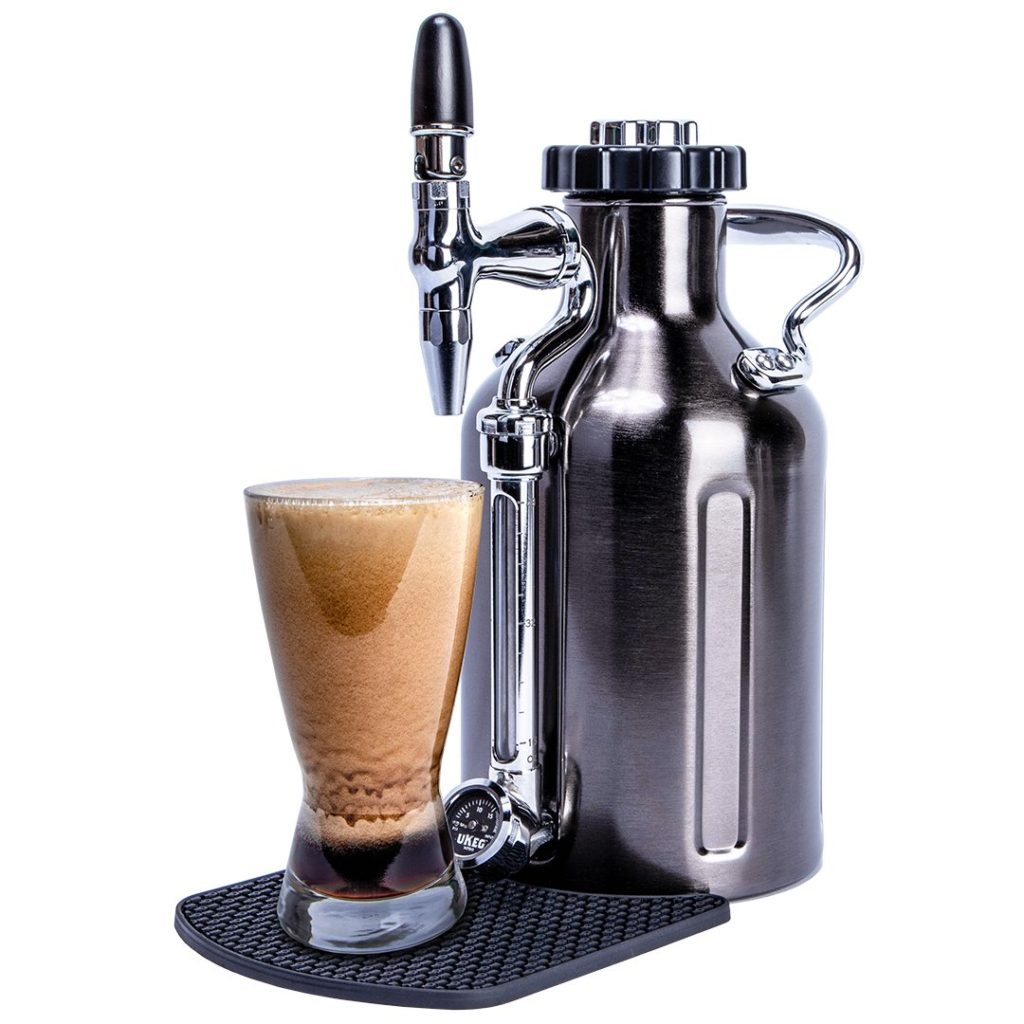
Cold Brew
How to use it:
Cold brewed coffee makers can work a number of different ways. But they all are based around one key idea: it takes a long time to brew. Most cold brew coffee makers take about 24 hours to brew your coffee. The reasoning is quite simple. If 200 degree water pulls out coffee in a matter of minutes. Therefore, room temperature or cold water will take a lot longer.
But, this slow process arguably brings out more flavors. This is so because there is no heat in the process to potentially destroy or distort flavors.
Cold brew coffeemakers might be immersive where the water sits with the grounds. Or it might be an adjusted extremely slow drip method. Or it might even have some nitrous oxide attachment so you can have nitro cold brew coffee. There are lots of similar coffee brewing methods that work as many of the above-mentioned methods. They all just have an extended brew period if you want any decent flavor from them. You could even use some different coffeemakers to cold brew. The Aeropress, for instance, can be used to simply immerse the coffee for a while. That way you don’t need a completely different coffee making device.
Pros:
You get slightly more caffeine per cup, as the heat doesn’t burn it off. There’s also typically less acidity and less bitterness associated with cold brewed coffees. It is also quite easy to make, and you don’t have to worry about controlling for specific water temperatures. The lighter taste of the coffee is also a benefit for drinkers who may be trying to get into black coffee. This could be a winner for those who might find it difficult to have that acquired taste just yet.
Cons:
Well, the most obvious negative to cold brewed coffee is how long it takes. If you need that extra cup of coffee and you’re brewing at home, life will be rough. You’re not going to be able to make as high-quality cold brewed coffee without a wider time frame. Also, the lack of heat in the water tends to not fully extract everything from the coffee beans. As a result, it takes a higher ratio of water to coffee as a result. Depending on your type of coffeemaker you may need to get a completely different brewing system. Although, some do overlap. Homemade cold brew coffee is also more likely to not be as consistent in flavor. The temperature of the water depends on the temperature of the room you’re in. Also,for longer brewing periods you’re probably more likely to let the brewing time sway by a couple hours.
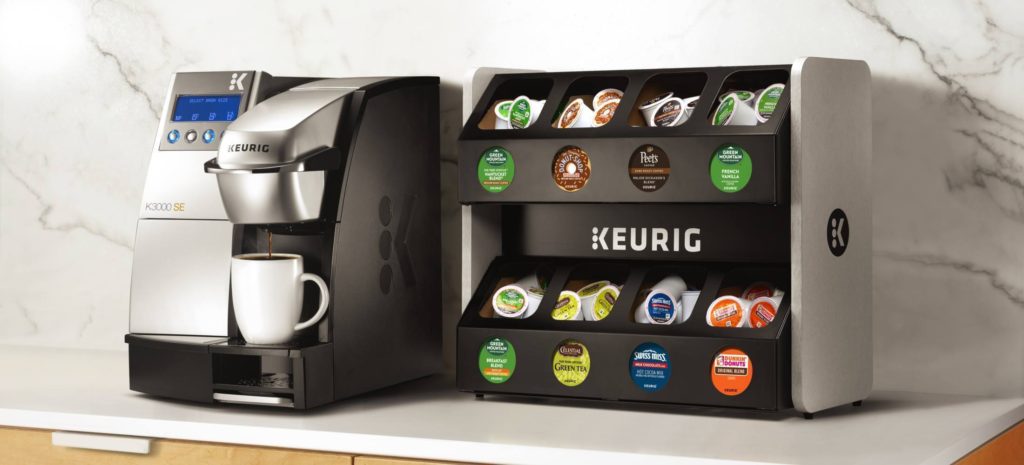
Single-Serve Pods
How to use it:
Single serve pod coffee makers are perhaps the easiest and cleanest brewing method around. Once you’re coffeemaker is set up, you first just need to ensure it has water in the tank. Then you just lift the lid, insert a pod, and close the lid. You probably have to select a coffee mug size by pressing a button. And, of course, make sure you have a coffee mug underneath the spout, and then wait a minute. There’s no messy coffee grounds to get everywhere, which is nice. Your water gets heated to a specific temperature and is brewed in a specific way. And all of this is done in a fairly quick way.
Pros:
If you are a fan of flavored coffee, coffee pods tend to have the most widely available flavors for you to choose from. At least, without having to worry about adding anything special to get those flavors. The easy clean up is a definite pro as well. You simply throw away the pod and be sure to run the cleaning cycle every once in awhile. Although depending on the maker there might be some concerns about how clean the inner-tubes might get. If your particular coffeemaker has a series of tubes inside it, that is. Also, the coffee gets poured straight into your mug, so no need to pour from a coffee pot. That also means you do not have to clean a coffee pot. You also do not need to worry about cleaning or replacing a filter, or anything like that.
Cons:
Single serve coffee pod systems are by far the most expensive of all of the coffee brewing methods. At least on a per cup basis that tends to be the case. You’re paying a premium for everything listed above. It also tends to not be very eco-friendly, although some coffee pod companies offer free recycling of their pods. Also, not all coffee pod makers can accept all sorts of coffee pods. Although it seems to be changing, many coffeemakers of this variety make specially shaped pods so that you can only buy their particular brand of coffee. This limits you to their options, while also making you more vulnerable to future price hikes. The machines themselves tend to be a bit pricier too.
Did we miss any coffee brewing methods? Do you have any questions about these different coffee brewing methods that perhaps we didn’t cover? Let us know in the comments, or by emailing us at: info at MatchMadeCoffee.com.
We’re thankful for your reading of this article. If you’d like to join our thankfulness newsletter that shares some special moments that we come across, enter your email address below. It’s meant to be a little weekly boost to your corner of the globe.
Sources and additional reading: